blank'/>

Astrophotography banner

Showing posts sorted by relevance for query Jupiter. Sort by date Show all posts

Sunday, January 30, 2011

Jupiter 2010 Opposition - Celestron 4SE NexImage Registax

These images and video capture Jupiter during its 2010 opposition, photographed on September 20 and September 21, 2010 from my backyard in Brooklyn, New York. Planetary opposition is one of the best times to observe Jupiter, as the planet is closest to Earth, appears brighter, and shows its largest apparent disk.

All video data was recorded using a Celestron NexStar 4SE telescope with a 2× Barlow lens and the original Celestron NexImage CCD camera. Despite heavy urban light pollution, Jupiter’s cloud bands and the Great Red Spot were clearly resolved using high-frame-rate video capture and stacking techniques.

Capture & Processing Details

  • Telescope: Celestron NexStar 4SE
  • Camera: Celestron NexImage CCD
  • Barlow Lens:
  • Frame Rate: 10 frames per second
  • Exposure: 1/10 second
  • Video Length: ~4 minutes per capture
  • Total Frames: ~2400
  • Resolution: 640 × 480 (AVI)
  • Stacking Software: RegiStax v5
  • Final Processing: Adobe Photoshop

The AVI video files were stacked in RegiStax v5, where the best frames were aligned and combined to reduce atmospheric turbulence. Wavelet sharpening was applied to enhance fine details, followed by final contrast and color adjustments in Photoshop.


The video demonstrates the complete planetary imaging workflow: the physical backyard telescope setup, live Jupiter capture using AmCap, raw CCD footage, RegiStax stacking and wavelet processing, and the final sharpened planetary images.

Three Jupiter images taken about one hour apart showing rotation and Great Red Spot movement
Jupiter Celestron 4SE NexImage Brooklyn Backyard astronomy

Image 1 shows three photographs of Jupiter arranged vertically, taken approximately one hour apart. The planet’s rotation is clearly visible through the changing position of the Great Red Spot. In the top image the Red Spot appears on the left side of Jupiter’s disk, in the middle image it is near the center, and in the bottom image it has moved toward the right side. From this sequence, Jupiter’s rapid rotation can be visually estimated directly from the photographs.


Second Jupiter rotation sequence showing Great Red Spot motion
Celestron 4 SE Jupiter Astrophoto Brooklyn

Image 2 shows the same three Jupiter photographs, again arranged vertically for comparison. This layout makes the motion of the Great Red Spot even easier to follow and highlights how much Jupiter rotates over a short period of time. Since Jupiter completes one full rotation in roughly 10 hours, significant surface movement can be observed within a single night of planetary imaging.


Comparison of raw single frame and final RegiStax stacked Jupiter image
Comparison original one frame and Registax final Image, Celestron 4 SE, Brooklyn

This project demonstrates how effective planetary imaging can be even from a light-polluted city when using high-frame-rate video capture and stacking techniques. Jupiter’s cloud belts, polar shading, and the Great Red Spot are clearly visible thanks to careful capture timing and RegiStax processing during opposition.

Related Astrophotography Posts

Thursday, June 12, 2014

Jupiter Moons and Red Spot - Astrophotography - Celestron 4SE

How does Jupiter hold up his trousers?
With an asteroid belt.

--Astronomy Jokes

Jupiter is one of the most exciting objects to observe in the solar system. Even a small telescope reveals its bright cloud belts, the famous Great Red Spot, and the four large Galilean moons — Io, Europa, Ganymede, and Callisto. Watching these moons change position from night to night (and sometimes hour to hour) is one of the highlights of amateur astronomy.

This photo was taken with my Celestron NexStar 4SE Maksutov telescope from Brooklyn, NYC. For bright planets like Jupiter, Mars, Venus, or Saturn, light pollution is not a problem at all. These planets are extremely bright, and the telescope’s tiny field of view blocks almost all city glow. Light pollution mainly affects faint stars and the Milky Way, but not planets — they remain sharp and clear even in a heavily light-polluted city like New York.

Capturing both Jupiter’s atmospheric details and all four moons in a single frame is not easy. The planet needs a very short exposure to reveal the belts and the Great Red Spot, while the moons require a much brighter setting. For the final image, I combined two photos — one optimized for Jupiter itself and another for the moons. I checked the ephemeris for that night so I could label each moon correctly. The positions of Jupiter’s moons can be easily found using online tools — for example, the Sky & Telescope Jupiter’s Moons calculator.

The Image


Jupiter with the Great Red Spot and Galilean moons captured through a Celestron 4SE telescope from Brooklyn NYC – astrophotography image
Jupiter Moons and Red Spot Astrophotography Celestron 4SE - Brooklyn NYC

What You Can See in the Image

  • Jupiter’s two main cloud belts
  • The Great Red Spot on the disk
  • All four Galilean moons correctly positioned for that night
  • Labeled moons based on calculated ephemeris

For a compact 4-inch telescope, this is a very satisfying result. The combination of sharp planetary details and the full set of moons gives a realistic view of the dynamic Jupiter system.

Gear & Technique

  • Telescope: Celestron NexStar 4SE Maksutov
  • Mount: GoTo Alt-Az
  • Method: Two-photo composite — short exposure for Jupiter, brighter exposure for moons
  • Main challenge: Huge difference in brightness between planet and moons

This image shows what a small telescope can do even in the middle of a major city. Planets are bright enough to cut through light pollution, and their details are visible whenever the atmosphere is steady.

Related Astrophotography Posts

Saturday, April 9, 2011

RegiStax 6 vs. 5 comparison - Jupiter Celestron 4SE

Here is an example of the difference between Registax v5 and v6 for Jupiter (Jupiter with Ganymede Moon and Ganymede Shadow Transit, September 18, 2010 - Celestron 4SE)

Registax v6 - Wavelet - Gaussian Initial Layer 3 Used Linked Wavelets with denoise 1 and 2 layers, RGB shift
Jupiter with Ganymede and shadow transit processed in Registax 6 using linked wavelets, Celestron 4SE astronomy
Registax 6, Celestron 4SE, Jupiter
Jupiter with Ganymede and shadow transit processed in Registax 5, Celestron 4SE backyard planetary astrophotography
Registax 5, Celestron 4SE, Jupiter
Some clouds are more visible in Registax v6, the shadow and Ganymede moon looks better. So my opinion Registax 6 gives better result with Used Linked Wavelets.

Related Astrophotography Posts


Sunday, January 26, 2014

Astrophotography Equipment DSLR Webcam Collage

This astrophotography collage shows a small collection of images representing different types of astronomical photography: solar and lunar eclipses, planetary imaging, deep sky objects, the Milky Way, aurora borealis, and astrophotography equipment.

The collage also illustrates some of the equipment used for capturing these images, including a Celestron NexStar 4SE telescope, Canon EOS DSLR cameras, astronomy webcams, and large astronomical binoculars. Different astronomical targets require different techniques — from long-exposure DSLR photography for wide-field night landscapes to high-frame-rate webcam imaging for planets like Saturn, Jupiter, and Mars.

Over the years I have experimented with multiple astrophotography methods: planetary imaging using RegiStax stacking, solar imaging with a Coronado SolarMax telescope, wide-field Milky Way photography, and eclipse photography. This collage represents some of those early experiments and observations.

Astrophotography collage showing Saturn, Jupiter, Mars, solar eclipse, aurora borealis, Milky Way and amateur telescope equipment
Astrophotography Equipment DSLR Webcam Collage – Planetary, Solar and Night Sky Astrophotography


Most of these images were captured from New York City or nearby locations, demonstrating that interesting astrophotography is possible even under light-polluted skies. Other images were taken from darker locations such as national parks and remote observing sites.


Astrophotography Posts Featured in This Collage

This collage shows how different branches of astrophotography — planetary, solar, deep-sky, night landscape, and atmospheric phenomena — can all be captured with relatively modest amateur equipment. From photographing the rings of Saturn and the cloud belts of Jupiter to capturing the Milky Way over dark landscapes, astrophotography allows us to explore the universe from our own planet.

Tuesday, October 15, 2019

Milky Way Casting Shadows - Chile Astrophotography - San Pedro de Atacama Celestial Explorations Star Tour

We all know that the Sun and the Moon cast shadows. But can the Milky Way itself be bright enough to do the same? In extremely dark locations, the answer is yes.

This panorama was captured during the San Pedro de Atacama Celestial Explorations Star Tour in northern Chile. On the image you can clearly see shadows of the trees cast only by the Milky Way — something that is possible only under the darkest skies on Earth.

According to the Bortle Scale of night-sky brightness, this region rates as a Class 1 – Excellent Dark-Sky Site. Here, the Scorpius–Sagittarius region of the Milky Way is so bright that it produces detectable diffuse shadows on the ground. It is an extremely rare and unforgettable sight.

For observers hoping to witness Milky Way shadows themselves, sky conditions matter as much as sky darkness. A Bortle Class 1 site is essential, but it is usually not sufficient on its own. The Galactic Center, located in the Scorpius–Sagittarius region, must be well above the horizon, where the Milky Way’s surface brightness reaches its maximum.

Shadows are not produced by individual stars, but by the combined light of billions of stars concentrated toward the Galactic Core. When this region is high in the sky and atmospheric extinction is minimal, the Milky Way can generate subtle but detectable contrast between illuminated and shaded areas on the ground.

The effect becomes even more noticeable when a bright planet such as Jupiter is present near the Milky Way, subtly reinforcing the overall illumination. Only when these conditions align — a true Bortle Class 1 sky, the Milky Way core high above the horizon, and additional planetary light — do Milky Way shadows become realistically observable.

Milky Way casting visible shadows on the desert ground during a star tour near San Pedro de Atacama, Chile — astrophotography by astroval1.
Milky Way Casting Shadows - Chile Astrophotography  - San Pedro de Atacama Celestial Explorations Star Tour

Near the horizon, green and red airglow is visible — a natural atmospheric luminescence often seen in extremely dark locations. The brightest “star” in the middle of the panorama is actually Jupiter.

Technical details:
Canon 60Da • EF16–35mm f/2.8L II USM • 25 sec • f/2.8 • ISO 6400
Panorama of 20 photos.

A slightly different version of this image was selected as the Dark Sky Travels Magazine – Image of the Day (17 November 2019).


Dark Sky Travels Magazine Image of the Day featuring Milky Way casting shadows in the Atacama Desert, Chile.
Dark Sky Travels Magazine Image of the Day

This photograph was captured in the Atacama Desert, Chile—one of the premier astrophotography locations on the planet. Many of the world’s leading observatories operate here (the other major hub is Hawai‘i’s Mauna Kea).

The image was taken near a small oasis where a few trees are present. It is astonishing to stand in near-total natural darkness and see shadows cast not by any artificial light, but by the bright central bulge of the Milky Way and the planet Jupiter.

This is what a true Bortle Class 1 sky looks like — the very definition of a perfect dark-sky environment.

Experiences like this reveal the Milky Way not as a distant backdrop, but as a luminous structure capable of shaping the landscape itself — a reminder of what the natural night sky can truly be.

Related Astrophotography Posts

Tuesday, August 16, 2011

Celestron NexStar 4SE and constellations

These photos show a simple way to recognize bright constellations in the night sky by combining a foreground telescope, natural landscape, and celestial patterns in a single frame.

The images were taken during a Full Moon. Moonlight provided natural illumination for the foreground, making the Celestron NexStar 4SE telescope and surrounding forest clearly visible without any artificial lighting. At the same time, the sky remained bright enough to record well-known constellations in the background.

The idea was to combine three elements: the observing instrument in the foreground, the natural landscape, and recognizable celestial constellations in the night sky. This visually connects amateur astronomy equipment with the real star patterns it is designed to observe.

Camera & settings:
Canon EOS 40D
30 seconds · ISO 200 · fixed tripod
Full Moon illumination

Ursa Major constellation above Celestron NexStar 4SE telescope under full moon
Celestron NexStar 4SE and Ursa Major constellation

In this image, the Ursa Major constellation is visible above the telescope. Ursa Major is one of the most recognizable constellations in the northern sky and contains the famous Big Dipper, often used as a starting point for learning star navigation.


Cassiopeia constellation above Celestron NexStar 4SE telescope night sky
Celestron NexStar 4SE and Cassiopeia constellation

In this image, the characteristic “W” shape of Cassiopeia can be clearly recognized. Cassiopeia lies roughly opposite Ursa Major across the North Star, making these two constellations excellent references for understanding the rotation and structure of the night sky.

Rather than focusing on deep-sky objects, this approach emphasizes orientation, scale, and context — showing how the telescope, forest, and constellations naturally come together under real observing conditions.

Related Celestron NexStar 4SE Astrophotography

Tuesday, May 31, 2016

Long Island Astrophotography - Custer Astronomical Observatory

Custer Astronomical Observatory is the oldest public observatory on Long Island, founded in 1927 and still active today. It remains a community hub for astronomy education, public stargazing events, and member observing sessions. These night-sky photos were taken during my visit, using a Canon 60Da and EF 16–35mm f/2.8L II USM lens (ISO 6400, 20–30 seconds). The observatory grounds include a classic research dome, a large radio telescope — an inspiring place for both amateur and professional astronomers, as well as astrophotographers who enjoy night-sky observation and imaging.


Long Island Astrophotography at Custer Astronomical Observatory – dome and radio telescope under night sky
Long Island Astrophotography - Custer Astronomical Observatory - Dome and Radio Telescope

Custer Observatory radio telescope with bright Jupiter over Long Island night sky
Custer Observatory Radio Telescope and Jupiter - Long Island Astrophotography
Big Dipper rising above the Custer Observatory dome during Long Island nightscape photography
Custer Observatory Dome and Big Dipper - Long Island Astrophotography
Interior of the Susan Mini Observatory at Custer Observatory during night landscape photography
Susan Mini Observatory inside Custer Observatory - Night Landscape
Silent Sky over Custer Astronomical Observatory on Long Island during night astrophotography
Silent Sky - Custer Observatory Long Island

Custer Astronomical Observatory continues to operate as an active nonprofit organization with weekly public observing nights, lectures, and special astronomy events. The site includes a main dome, a large radio telescope, and several smaller member-owned observatories. Amateur astronomers store their telescopes on-site and regularly conduct observations, making Custer one of the most vibrant astronomy communities in the New York region.

Related Astrophotography Posts

Monday, March 2, 2015

Puerto Rico Astrophotography

You might be an amateur astronomer if
you center your vacation time around the New Moon.

--Amateur Astronomer Jokes

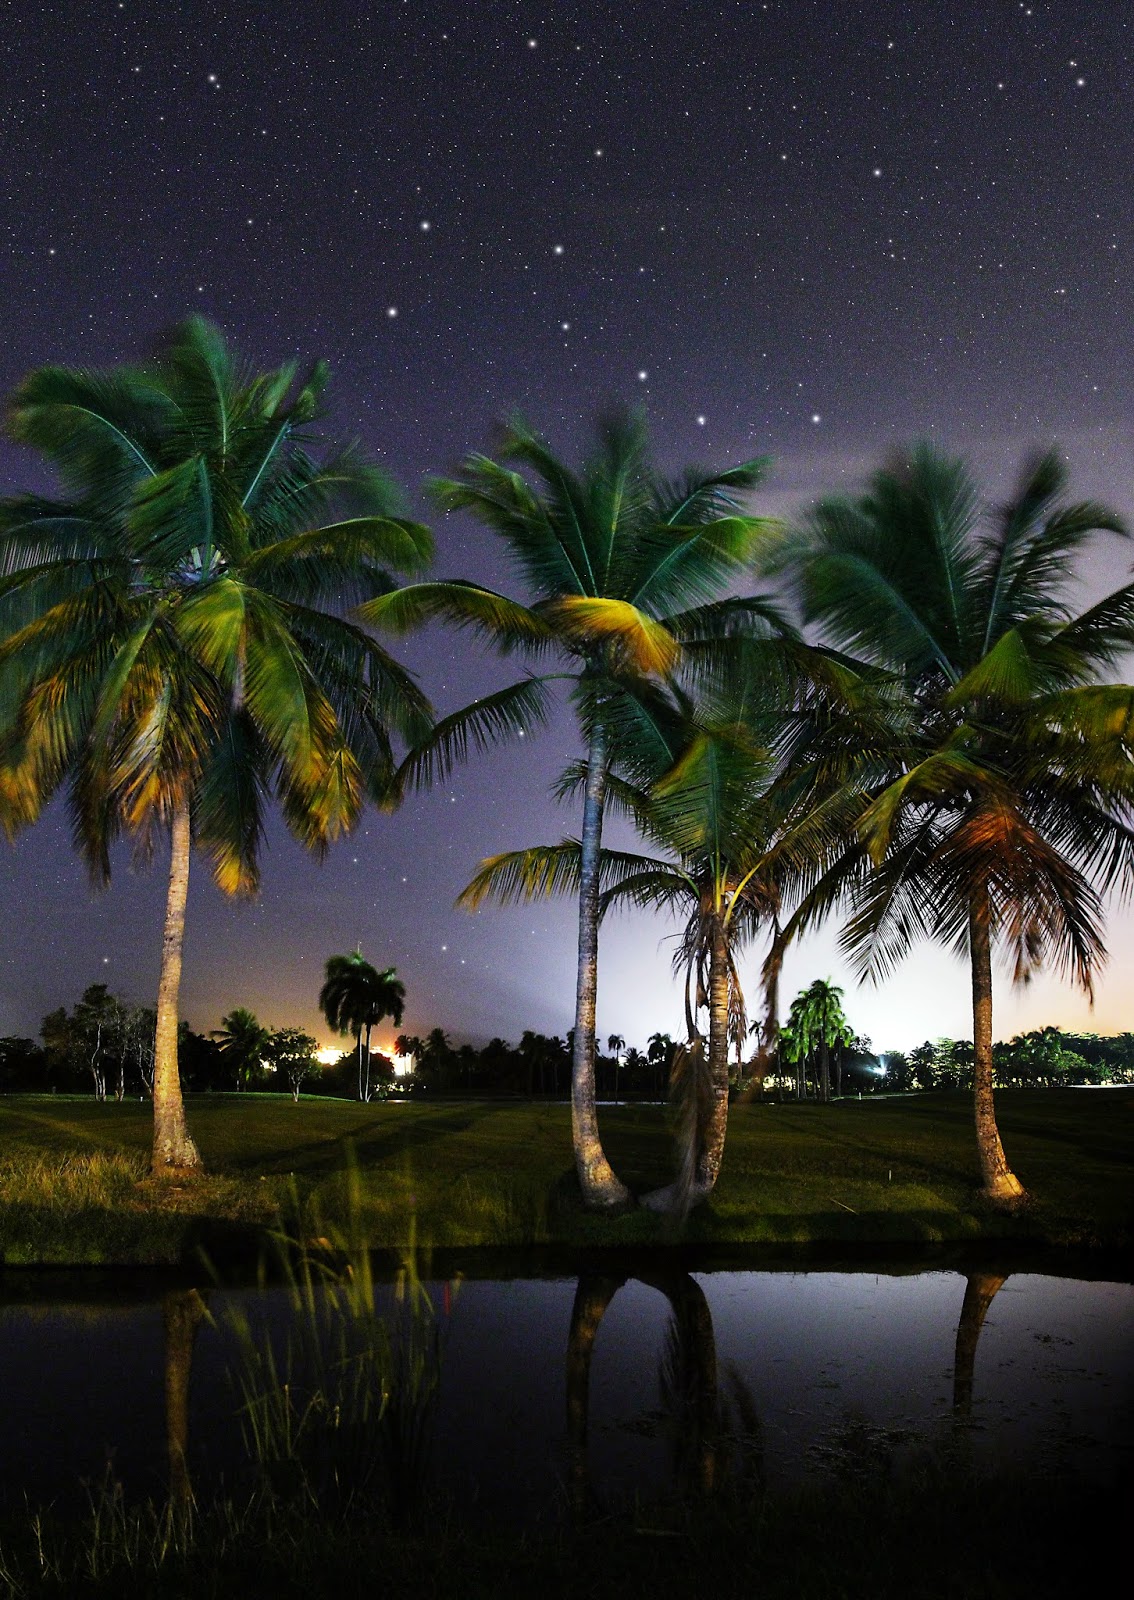
These images were captured during my trip to Puerto Rico, where tropical landscapes, low latitude skies, and dark coastal locations create unique conditions for astrophotography. Palm trees, yachts, and ocean waves combine naturally with constellations and the Milky Way, producing nightscapes that look very different from those photographed at higher northern latitudes.

Big Dipper constellation over palm trees in Puerto Rico astrophotography panorama
Puerto Rico Astrophotography - Big Dipper constellation, Canon 60Da

Location: Wyndham Grand Rio Mar Beach Resort, Puerto Rico
Canon EOS 60Da · EF 16–35mm f/2.8L II USM · Panorama of 4 frames · ISO 3200 · f/6.3

This image can be used as a practical astronomy question: “What is the latitude of the observer?” Palm trees and the low altitude of the Big Dipper provide strong clues that this photo was taken much closer to the equator than typical northern U.S. locations.

Palm trees and planet Jupiter in Puerto Rico night sky astrophotography
Palm trees and Jupiter in the Puerto Rico night sky

Canon EOS 60Da · EF 16–35mm f/2.8L II USM · 20 sec · ISO 3200 · f/4.5

Orion and Canis Major constellations above palm trees in Puerto Rico
Palm trees with Orion and Canis Major — Puerto Rico astrophotography

 Canon EOS 60Da, EF16-35mm f/2.8L II USM lens, 20 sec, ISO-3200, F4.5

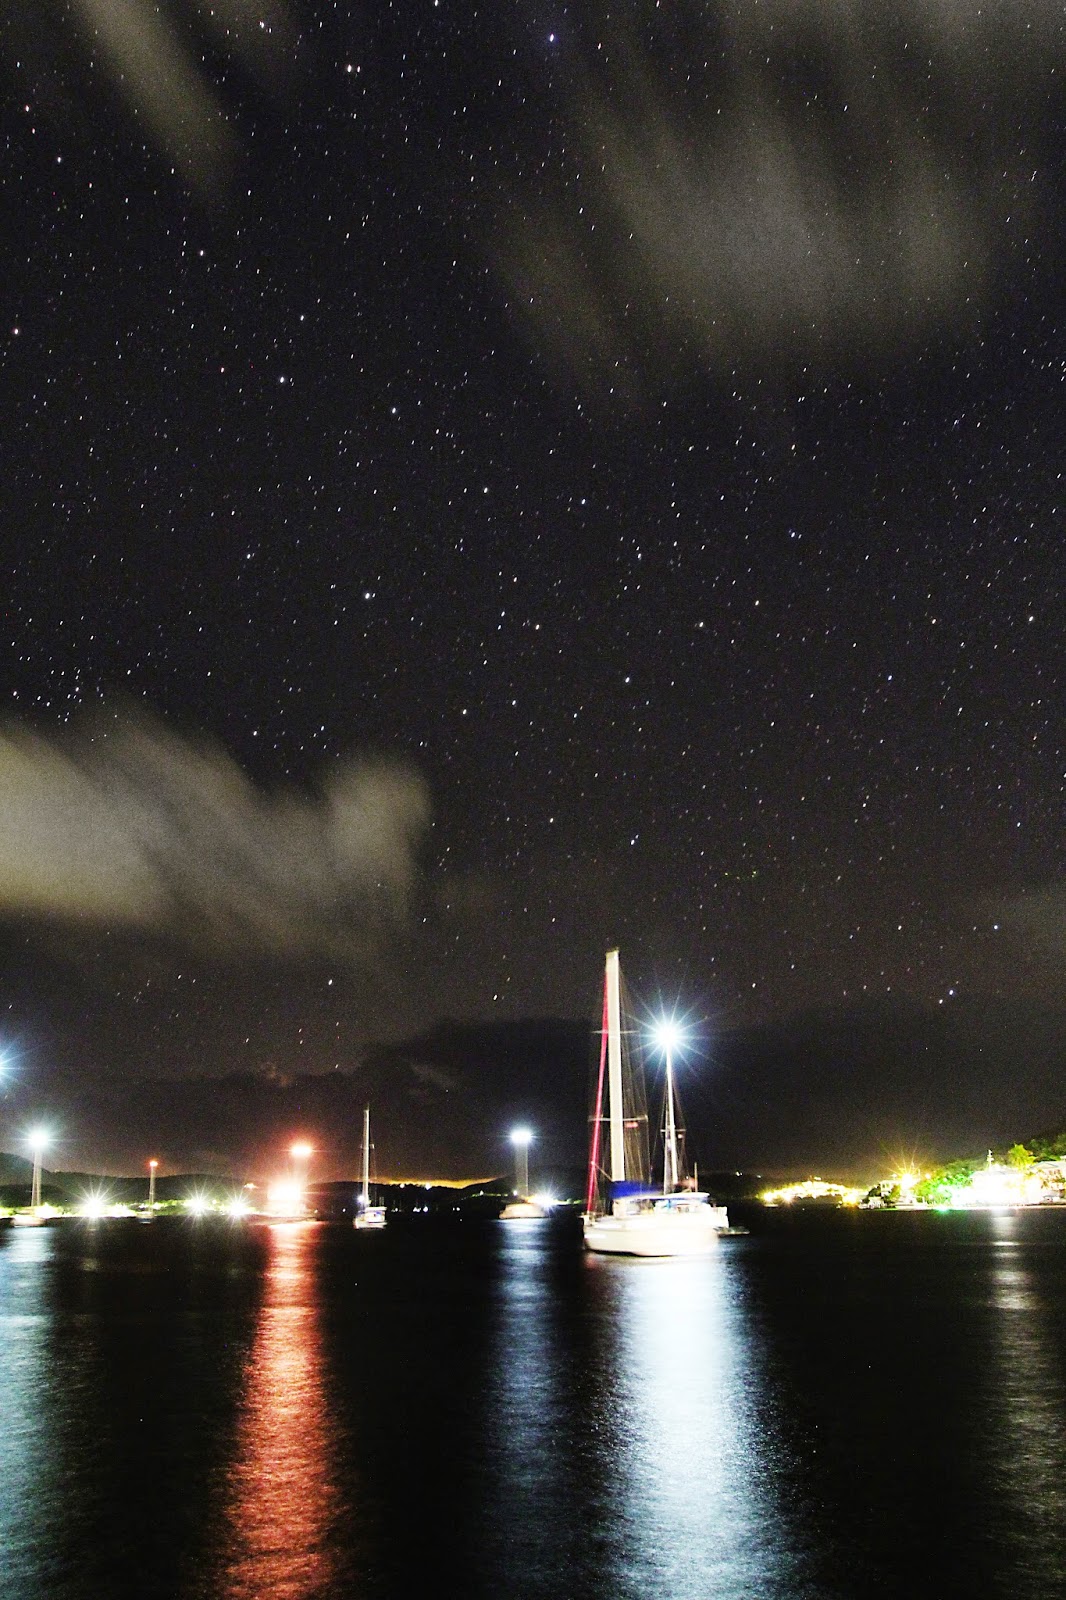
Yacht astrophotography at Culebra Island Puerto Rico showing long-exposure night sky and ocean motion
Yacht astrophotography at Culebra Island Puerto Rico with long exposure night sky
 Long exposure and waves gave such interesting yacht effect
Canon 60Da, EF16-35mm f/2.8L II USM lens, 30 sec, ISO-3200, F4

Near-equator view of the Big and Little Dippers in Puerto Rico nightscape astrophotography
Near Equator Big and Little Dippers Puerto Rico Nightscape Astrophotography

Canon 60Da, Wide Angle EF16-35mm f/2.8L II USM lens, 10 sec, ISO-6400, F2.8

Polaris North Star marked with laser pointer over golf course in Puerto Rico astrophotography
Northern Pole  Star - Polaris - Laser Pointer Puerto Rico Golf Course Astrophotography

 Canon 60Da, EF16-35mm f/2.8L II USM lens, 14 sec, ISO-3200, F6.3

Dark-sky nightscape from Culebra Island Puerto Rico showing stars over tropical landscape
Culebra Puerto Rico Night Sky
  Canon 60Da, EF16-35mm f/2.8L II USM lens, 30 sec, ISO-3200, F4

Advanced Astrophotography — Tracked Exposure

The final image below represents a different level of astrophotography. Unlike the previous nightscapes, this photograph was captured using a star tracker, allowing a much longer exposure and revealing faint nebulae invisible in short exposures.

Tracked wide-field astrophotography of Orion showing Barnard’s Loop and Winter Milky Way from Culebra Island Puerto Rico
Orion, Canis Major and Milky Way - iOptron SkyTracker  Astrophotography Puerto Rico

Barnard’s Loop is often one of the first emission nebulae successfully captured in tracked wide-field astrophotography, making it a natural milestone for beginners moving beyond nightscapes.

Canon EOS 60Da · EF 16–35mm f/2.8L II USM · iOptron SkyTracker
120 sec · ISO 3200 · f/4.0 · Culebra Island, Puerto Rico

At this exposure length, faint objects become visible, including Barnard’s Loop, the Great Orion Nebula (M42), Horsehead Nebula (IC 434), Witch Head Nebula (IC 2118), Rosette Nebula, and Seagull Nebula (IC 2177).

Winter Milky Way images are more challenging than summer Milky Way photography because the galactic center lies on the opposite side of the sky. Tracking with the iOptron SkyTracker made it possible to capture significantly more detail despite limited clear skies.

Related Astrophotography Posts

Wednesday, September 4, 2019

Zodiacal Light Bolivia Astrophotography

This Zodiacal Light astrophotography image was captured in the high Andes of Bolivia, approximately two hours after sunset, during a New Moon night. The observation site was near Hotel Jardines De Mallku Cueva, at an elevation of 4,020 meters (13,190 feet), where the atmosphere is exceptionally clear and dry.

The faint triangular glow rising from the western horizon is the zodiacal light, aligned with the ecliptic plane. Jupiter is visible near the top of the frame, providing a natural reference point above the glowing dust column. Despite the camera’s enhanced sensitivity, the zodiacal light was clearly visible to the naked eye, a rare experience even for experienced observers.

For beginners, planets provide one of the easiest ways to locate the zodiacal light. All major planets orbit within the ecliptic plane — the same plane in which the zodiacal dust cloud is distributed. If you remember where the Sun set and can identify at least one bright planet after dusk, that planet effectively marks the path along which the zodiacal light may appear.

When two or more planets are visible, the orientation of the Solar System’s plane becomes even clearer. The same approach works before sunrise: by noting the position of a bright planet and the upcoming direction of sunrise, you can determine where to search for the faint zodiacal glow.

Modern mobile sky-mapping applications can also be helpful, but seeing zodiacal light visually offers something unique — while the plane of our Galaxy is easily traced by the Milky Way, the plane of the Solar System is far more subtle. Observing zodiacal light is one of the few ways to directly perceive that solar plane with the naked eye.

Captured with Canon EOS 60Da and Canon EF 16–35mm f/2.8L, this panorama consists of three stitched exposures, each taken at 25 seconds, f/2.8, ISO 6400.

Zodiacal Light over the Andes in Bolivia with Jupiter visible above the ecliptic, captured at 4020 meters during New Moon
Zodiacal Light over the Andes, Bolivia – New Moon astrophotography at 4,020 meters

Zodiacal light is a faint, diffuse, and roughly triangular glow visible in exceptionally dark skies, appearing along the zodiac and following the ecliptic plane. It is brightest near the horizon and gradually fades upward, tilted according to the seasonal angle of the ecliptic.

This glow is caused by sunlight scattering off microscopic interplanetary dust particles distributed throughout the inner Solar System. Most of this dust is believed to originate from cometary debris and collisions between small rocky bodies.

High-altitude locations such as the Bolivian Andes dramatically enhance zodiacal light visibility due to reduced atmospheric scattering, extremely low humidity, and minimal light pollution.

Below is a color-enhanced variation of the same zodiacal light panorama, revealing subtle gradients and dust-scattering structure that are difficult to perceive visually.

Color-enhanced zodiacal light astrophotography showing interplanetary dust glow along the ecliptic
Zodiacal Light Astrophotography

The black and white version below is the closest representation of what the zodiacal light appeared like to the human eye — a soft, ghostly glow rising from the horizon, barely distinguishable from the natural night sky background.

Black and white zodiacal light astrophotography showing faint triangular glow similar to naked-eye view
Zodiacal Light Astrophotography Black and White
 

Observing zodiacal light from the high Andes of Bolivia was a reminder that not all structures in the night sky are immediately obvious. While the Milky Way clearly traces the plane of our Galaxy, zodiacal light reveals the far subtler plane of our Solar System itself — made visible only under pristine conditions. At high altitude, far from light pollution, this delicate glow becomes one of the most rewarding naked-eye experiences in night-sky observation.

Related Astrophotography Posts

Sunday, February 6, 2011

NexStar 4se telescope with T-Adapter-C90 (93635-A) and Canon EOS 40D

How to attach a Canon DSLR to the Celestron NexStar 4SE using the T-Adapter-C90 (93635-A) and a Canon EOS T-Ring — a simple and reliable setup for beginner astrophotography.

The Celestron NexStar 4SE is one of the most popular beginner telescopes for planetary, lunar, solar, and bright nebula photography, making it an excellent first step into real astrophotography. This post shows the exact setup I used to attach my Canon EOS 40D DSLR to the NexStar 4SE using the T-Adapter-C90 (93635-A) and a Canon EOS T-ring. If you’re just beginning telescope astrophotography, this is the first and most important connection you need to learn.


How the DSLR attaches to the NexStar 4SE

The process is simple: the telescope's visual back accepts the T-Adapter-C90, and the Canon EOS T-ring attaches to the adapter. Once the T-ring is locked onto your DSLR, the entire camera becomes the “eyepiece,” letting you capture the Moon, planets, and bright star fields directly through the optical system.

Canon EOS 40D attached to Celestron NexStar 4SE using T-Adapter-C90 (93635-A) and Canon EOS T-ring for prime focus astrophotography
Canon EOS 40D attached to Celestron NexStar 4SE using the T-Adapter-C90 (93635-A) and Canon EOS T-ring


This is the complete physical connection: Telescope → T-Adapter → Canon T-Ring → DSLR. No eyepiece is used during prime-focus astrophotography.

Equipment used

  • Celestron NexStar 4SE Maksutov-Cassegrain telescope
  • T-Adapter-C90 (Celestron 93635-A)
  • T-ring for Canon EOS
  • Canon EOS 40D DSLR camera

Why This Setup Works Well

This configuration enables prime focus astrophotography, where the telescope’s optics act as the camera’s lens. By attaching the Canon EOS 40D directly to the Celestron NexStar 4SE using the T-Adapter and T-Ring, you get a stable, optically efficient setup ideal for bright astronomical targets.

This setup is perfect for photographing objects such as:

  • The Moon (excellent detail and sharp contrast)
  • Jupiter and Saturn (rings, cloud bands, moons)
  • Venus and Mars
  • The Sun — ONLY with a proper solar filter
  • Bright star fields and clusters
  • Bright nebulae (such as the Orion Nebula)

More advanced astrophotographers can later use the NexStar 4SE for certain deep-sky projects with skill and practice, so this telescope can grow with you as you learn. But for beginners, its strongest and most exciting results come from planetary and lunar photography, where the 4SE delivers sharp, detailed images right from the start.

Assembly Series: Connecting a Canon EOS Camera to the Celestron NexStar 4SE

More Celestron 4SE Astrophotography

Wednesday, April 4, 2012

Mars – Celestron NexStar 4SE Backyard Astrophotography

On April 2, 2012, I attempted to capture detailed surface features of Mars from my backyard using a compact Celestron NexStar 4SE (102mm) telescope.

Unlike the Moon or the Sun — which appear large and forgiving — Mars is a much smaller and more demanding target. Even during favorable oppositions, it presents only a tiny disk. This made it a real challenge for a 4-inch Schmidt–Cassegrain.

Mars photographed with Celestron NexStar 4SE 102mm telescope and NexImage camera
Mars Celestron NexStar 4SE (102mm) NexImage, 2-x Barlow 

Equipment

  • Telescope: Celestron NexStar 4SE (102mm aperture)
  • Camera: Celestron NexImage
  • Barlow:
  • Mount: Alt-Az GoTo tracking

Image Capture

Video duration: 4 minutes (240 seconds)
Frame rate: 10 frames per second
Total frames captured: 2400

Capturing video instead of a single frame allows atmospheric turbulence to be minimized by stacking only the sharpest frames.


Processing Workflow

RegiStax v6.1:

  • Drizzle optimization
  • Wavelets (default initial Layer 1)
  • RGB alignment (RGB shift)
  • Resize image 200%

Photoshop:

After stacking in RegiStax, subtle details were present but not clearly visible. To enhance them carefully:

  • Slightly reduced brightness to allow stronger sharpening
  • Applied Unsharp Mask to enhance fine details
  • Reduced artifacts using Median Noise (radius 3)
  • Minor color adjustment (slight magenta correction)

Aggressive sharpening can easily introduce artificial structures, so careful balance was necessary — especially with a small 4-inch telescope.


Observational Notes

April 2, 2012 — 9:47 PM

The Moon and Sun are large targets and well suited for the NexStar 4SE. Saturn and Jupiter also show satisfying detail. Mars, however, is significantly smaller and requires much steadier seeing and careful handling of scale. That is why I used a 2× Barlow for optical magnification during capture, and later applied RegiStax v6.1 “Resize 200%” to make the processed image easier to sharpen and evaluate. The software resize does not create new detail, but it helps present subtle features more clearly and makes visual comparison with Mars reference maps much easier.

This image demonstrates that even with a modest and affordable telescope, it is possible to resolve real Martian albedo features when conditions cooperate.

In the next post, I compare this image to simulation software and professional Mars maps to identify the visible surface regions.

Related Posts

Sunday, August 11, 2013

Perseid meteor shower: This bright meteor August 11 2013

I would rather be ashes than dust! I would rather be a superb meteor, every atom of me in magnificent glow, than a sleepy and permanent planet.
- Jack London

These images capture a bright Perseid meteor photographed on August 11, 2013, one night before the peak of the annual Perseid meteor shower. Perseids are known for their fast velocities and bluish-white color, caused by their high entry speed and ionization of atmospheric gases.

This meteor streaked across the constellation Cygnus, leaving a sharp, luminous trail characteristic of Perseid meteors originating from comet 109P/Swift–Tuttle. The photograph was taken from New York under summer night skies using a long exposure to maximize the chance of capturing a meteor.

Camera: Canon EOS 40D
Lens: Canon EF 16–35mm f/2.8L II USM
Exposure: 2 minutes
ISO: 1600
Mount: Tripod
Date: August 11, 2013

Bright Perseid meteor streaking across the Cygnus constellation one night before peak, August 11 2013
Perseid meteor shower: This bright meteor across the Cygnus constellation
August 11 2013 - one night before maximum. Canon 40D Ultra Wide Angle Canon Lens EF 16 35mm f2.8L II U, 2min, ISO 1600, Tripode, NY Astrophotography

The second image below is a cropped and zoomed-in view of the same meteor, revealing its sharp core and subtle color variations. The bluish-white hue is a classic Perseid signature, produced by the meteor’s extreme atmospheric entry speed of roughly 55–65 km/s as it vaporizes in Earth’s atmosphere.

In the zoomed image, the meteor trail clearly shows a classic Perseid structure: it begins as a thin, faint streak, rapidly swells into a thicker and brighter central section, and then tapers off again as the meteoroid fragments and fully ablates in the upper atmosphere. This changing width and brightness reflect variations in velocity, mass loss, and ionization along the meteor’s path.

Because this image was captured as a 2-minute long exposure, the stars do not appear as points but as short arcs, reflecting Earth’s rotation. Despite this, the Cassiopeia constellation is still identifiable in the lower-left corner of the first (wide-field) image, although it falls outside the frame in the zoomed view.

Using Cassiopeia as a reference and comparing the field orientation with a Stellarium sky map, the meteor’s trajectory can be traced back toward the Perseids radiant, which lies just outside the image frame. This confirms the meteor’s direction of motion from lower-left toward upper-right, consistent with a Perseid origin.

Notably, the meteor’s structure also supports this identification: the section closer to the radiant (the beginning of the trail) appears longer and fainter, while the terminal portion farther from the radiant is shorter, brighter, and sharper. This asymmetry reflects the rapid increase in ablation and brightness as the meteoroid penetrates deeper into the atmosphere.

The longer, fainter beginning of the meteor trail can be explained by a combination of perspective effects and atmospheric physics. Near the Perseids radiant, the meteor’s motion is largely along the line of sight, producing a foreshortened, slow-appearing streak. At these very high altitudes, the atmosphere is extremely thin, resulting in faint emission that can extend over a comparatively long visible path.

As the meteoroid penetrates deeper into the denser mesosphere, ablation increases rapidly, producing the bright, thick central section of the trail. Once the particle is fully consumed, the light drops off abruptly, creating a short, sharp terminal end rather than a gradual fade.

Zoomed-in crop of bluish-white Perseid meteor showing sharp luminous trail, August 11 2013
Perseid meteor shower: This bright meteor August 11 2013, Canon 40D Ultra Wide Angle Canon Lens EF 16 35mm f2.8L II U, Astrophotography

Together, the meteor’s color, direction, brightness profile, and changing trail structure all point to a classic Perseid meteor captured under summer skies just before peak activity. Even in a single long exposure, careful analysis reveals both the geometry of the radiant and the physical processes governing meteoroid ablation high above Earth.

Related Astrophotography Posts

Saturday, April 2, 2011

RegiStax 6 - Astrophotography Saturn - Testing new version v6

In April 2011, RegiStax 6 was officially released — and I immediately downloaded it to test on one of my favorite planetary targets: Saturn.

For planetary astrophotographers, RegiStax has long been one of the most important free tools available. The new version introduced major improvements in alignment, wavelet sharpening, and processing speed — making experimentation much easier and more intuitive.


What Was New in RegiStax 6?

Release date: April 2, 2011
Platform tested: Windows Vista

Installation was simple and smooth. Compared to Version 5, the interface became noticeably more intuitive and streamlined.

One of the biggest improvements for me was the multi-alignment feature. In Version 5, I occasionally experienced alignment issues. In RegiStax 6, alignment worked flawlessly — almost like magic.

The introduction of Linked Wavelet Layers was a game-changer. This allowed more controlled sharpening adjustments across layers, producing smoother yet detailed planetary surfaces.

Processing speed was significantly improved, allowing more experimentation with parameters — essential when trying to extract fine details from stacked planetary frames.

Equipment Used for Saturn Imaging

Telescope: Celestron NexStar 4SE
Barlow Lens: 2× Barlow
Camera: NexImage planetary webcam
Location: Brooklyn, New York
Target: Saturn

This setup represents classic early-2010s webcam planetary astrophotography — recording AVI video files and stacking thousands of frames in RegiStax.

Saturn astrophotography using Celestron NexStar 4SE and NexImage webcam processed in RegiStax 6
Webcam Astrophotography - Celestron 4SE NexImage - Brooklyn Astronomy

Processing Workflow in RegiStax 6

The video above demonstrates the full workflow:

  • Loading AVI video file
  • Setting alignment points
  • Frame quality analysis
  • Stacking selected frames
  • Wavelet sharpening (linked layers)
  • Final image optimization

Stacking video frames dramatically improves signal-to-noise ratio and reveals planetary details such as Saturn’s ring structure and atmospheric banding.

Why RegiStax Was (and Still Is) Important

In the early 2010s, RegiStax was one of the most accessible tools for amateur planetary imaging. It allowed backyard astronomers — even from urban environments like Brooklyn — to capture detailed images of planets.

Even today, many astrophotographers use RegiStax for final wavelet sharpening after stacking in AutoStakkert.

Huge thanks to the developers of RegiStax for creating and maintaining such an incredible free tool for the astronomy community.

Related Astrophotography Posts


Monday, March 28, 2011

Saturn Celestron NexStar 4SE Telescope RegiStax NexImage

This post documents my backyard astrophotography session capturing Saturn near opposition (March 20–25, 2011) using the Celestron NexStar 4SE telescope and Celestron NexImage CCD webcam.

The video below shows the complete workflow — from GoTo alignment and telescope setup to live planetary capture and final image processing in RegiStax.


Backyard Planetary Imaging Workflow

Location: Brooklyn, New York
Telescope: Celestron NexStar 4SE (GoTo, Solar System Align)
Camera: Celestron NexImage CCD (VGA 640×480)
Barlow: 2× Barlow (1.25")
Capture Software: AMCap
Processing: RegiStax 5.1.9.2

The video demonstrates:

  • Solar System GoTo alignment
  • Selecting Saturn in the NexStar controller
  • Physical setup of telescope and NexImage webcam
  • Live capture of Saturn using AMCap
  • Stacking and sharpening workflow in RegiStax
  • Final processed Saturn images

Capture Details

Two video sequences were recorded:

  • 7 minutes (420 sec) at 5 fps → 2100 frames
  • 1 min 40 sec (100 sec) at 10 fps → 1000 frames

Processing settings in RegiStax v5 included:

  • Align: Default / Center of Gravity / Gradient2
  • Drizzle optimization
  • Wavelets: Gaussian (Initial Layer 2)
  • RGB Align – Estimate
  • Histogram stretch

Even from an urban backyard, careful stacking revealed remarkable detail in Saturn’s ring system.

Cassini Division from a Backyard Telescope

A thin black gap in Saturn’s rings — the Cassini Division — is clearly visible in the final stacked images.

The Cassini Division is a 4,800 km wide separation between Saturn’s A and B rings. Observing it with a 4-inch telescope under city skies is always a rewarding confirmation of good seeing conditions and proper processing.

Equipment Setup – Behind the Scenes

Celestron NexStar 4SE telescope with NexImage webcam setup for Saturn imaging in Brooklyn backyard astrophotography.
NexImage and Celestron 4SE- Brooklyn Astrophotography

In the first image, the NexImage CCD webcam is shown attached directly to the telescope’s (photo taken from behind the telescope for better detail).

"Brooklyn astrophotography setup using Celestron NexStar 4SE telescope and NexImage CCD webcam for capturing Saturn.
Brooklyn Astronomy and Astrophotography - Celestron 4SE and Celestron NexImage


The second image shows the full backyard setup — telescope, NexImage webcam, USB cable connected to the laptop running AMCap software.

NYC backyard astrophotography with Celestron NexStar 4SE telescope and NexImage webcam capturing planets like Saturn.
NYC Astrophotography - Celestron 4SE and NexImage

The third image shows the telescope from the opposite side, with the NexStar GoTo control panel clearly visible.

Small Telescope, Real Planetary Detail

This setup demonstrates that meaningful planetary astrophotography does not require a large observatory or expensive professional equipment. Even with a small and relatively affordable 4-inch telescope like the Celestron NexStar 4SE, a basic planetary webcam, and proper stacking techniques, detailed views of Saturn are achievable.

Features such as the Cassini Division, ring shadowing on the planet’s disk, and subtle atmospheric banding become visible after stacking thousands of video frames and applying careful wavelet sharpening.

This is one of the most exciting aspects of modern amateur astronomy: high-resolution planetary imaging is accessible to backyard observers using compact, beginner-friendly equipment.

More Imaging with Celestron NexStar 4SE

Monday, January 31, 2011

Backyard Astronomy - Astrophotography Celestron NexStar 4se

Backyard Astronomy - Astrophotography Celestron
NexStar 4se telescope
Canon EOS 40D and T-Adapter-C90 and Barlow T-Adapter 1 1/4 inches and T-ring for Canon EOS
Celestron 4se telescope with T-Adapter-C90 (93635-A) and Canon EOS 40D
Celestron 4se telescope with Barlow t-Adapter 1 1/4 inches (93640) and Canon EOS 40D
Celestron 4se with Barlow t-Adapter 1 1/4 inches (93640), Erect Image Diagonal (94116) and Canon EOS 40D
Photos of the Moon and the Sun
Celestron NexStar 4se telescope NexImage CCD
Jupiter photos
Piggy-Back Camera Mount for Celestron NexStar 4 telescope (Item# BRKTPIG4)
The Green Comet 103P/Hartley 2 (2010)


Moon Celestron 4SE Canon 40D Astronomy Brooklyn Astrophotography